

Test orders
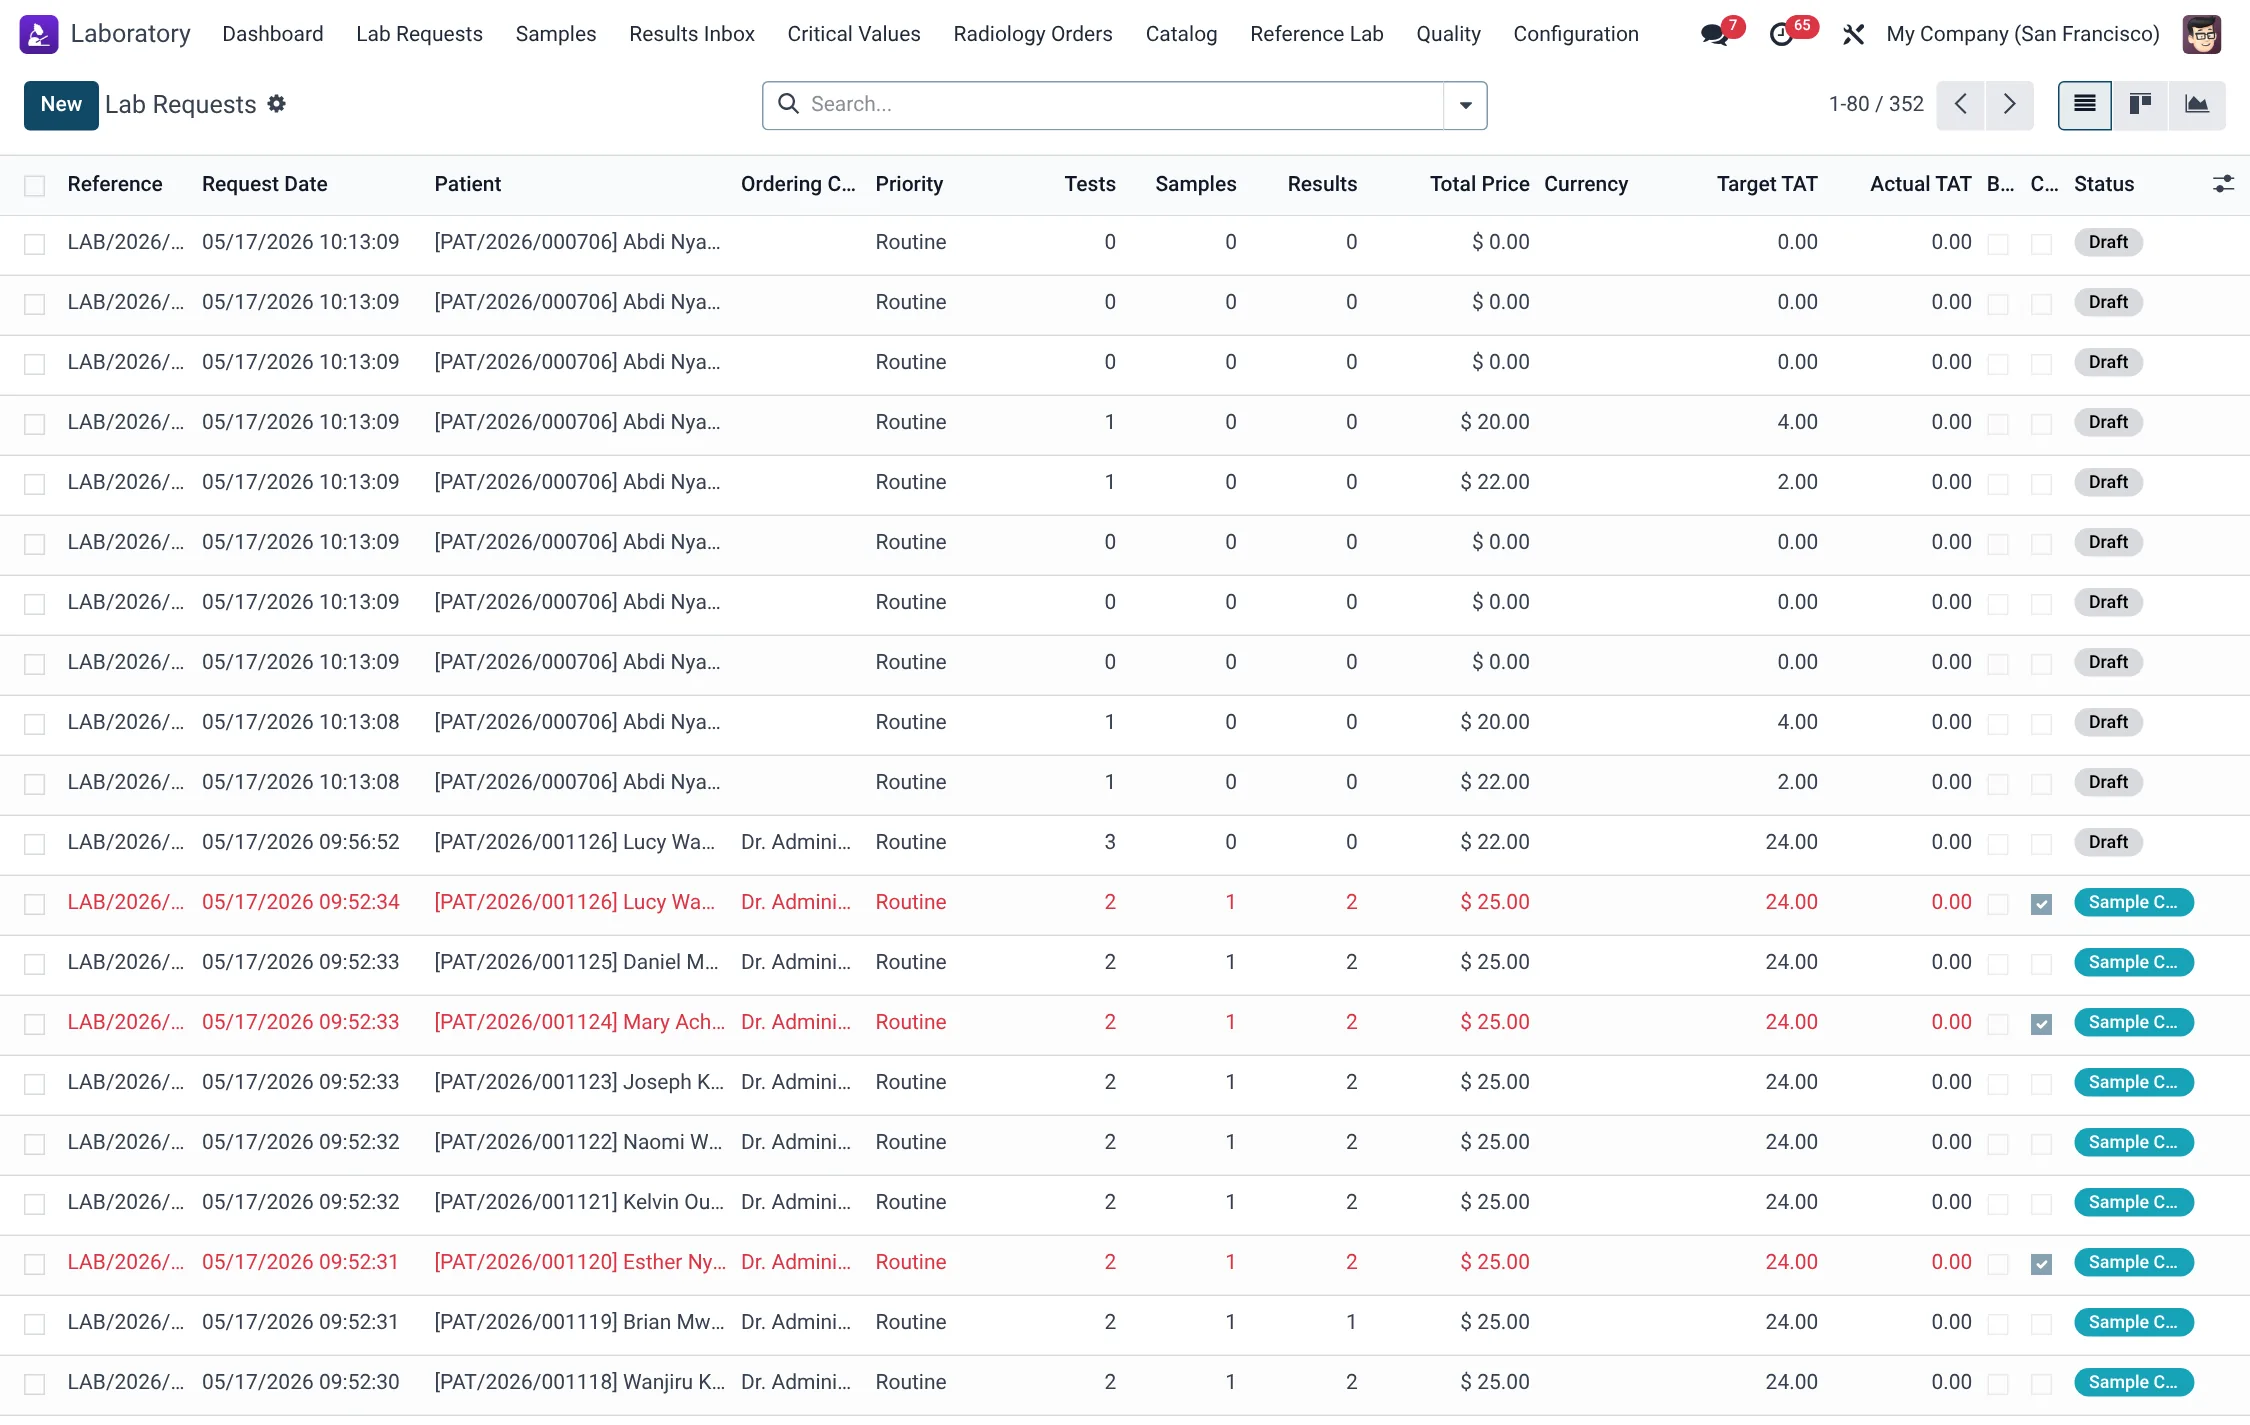
This page covers the front half of the laboratory workflow: raising a test order, collecting and labelling specimens, accessioning them into the lab, and maintaining an unbroken chain of custody. Getting this stage right is what makes the rest of the lab reliable — a mislabelled or rejected specimen here is the single most common cause of a delayed or wrong result.
Where to find it
Orders and specimens are managed from two menus:
- Laboratory → Lab Requests — the list of test orders and the New button to raise one.
- Laboratory → Samples — the specimen records, where collection, receipt, rejection, storage and disposal happen.
An order can also be raised in context from a patient consultation, so the request is already linked to the right consultation, visit and patient.
Before you start
You need a populated Test Catalog (Laboratory → Catalog → Test Catalog) and, ideally, Panels defined for common groupings. Each test specifies its default sample type and container, so the system can tell collection staff which tube to draw. If a test is marked Requires Fasting or Requires Written Consent, the request will flag this automatically.
Step-by-step: raise a test order
- Open Laboratory → Lab Requests and click New. The request opens in Draft.
- Select the Patient, and link the Consultation or Visit if not already populated. The Ordering Clinician and Facility default from the current user and company.
- Set the Priority — Routine, Urgent or STAT.
- Add Tests in the lines. You may add individual tests or a panel; panels are expanded into their component tests automatically.
- Enter Clinical Information / Indication so the lab understands the request.
- Click Submit. The request moves from Draft to Requested and is ready for specimen collection.
Step-by-step: collect specimens and label them
- On the request, use Collect Samples to generate specimen records, or create them from Laboratory → Samples linked to the request.
- Each sample is born in Collected status with a unique Barcode, a Sample Type (whole blood, serum, plasma, urine, CSF, swab, sputum, tissue and others) and a Container tube type (EDTA lavender, serum-separator gold, lithium-heparin green, sodium-citrate light-blue, sodium-fluoride grey, plain red, sterile container, swab transport tube or viral transport medium).
- Record the Collected By user, the Collected At time and the Volume (mL).
- Use Print Label on the sample to produce the barcoded specimen label and apply it at the patient's side.
Step-by-step: accession (receive) specimens
- When the specimen reaches the lab, open it under Laboratory → Samples and click Receive. Status moves from Collected to Received in Lab and the Received in Lab timestamp is set.
- When every specimen on a request is received (or stored), the parent request automatically advances to Sample Collected, signalling that processing can begin.
- If a specimen is unsuitable, pick a Rejection Reason and click Reject — the system records the rejection, notifies the ordering clinician to arrange re-collection, and (where configured) sends a rejection notice.
- Specimens not yet processed can be moved to Store (status Stored) with a storage location, and later Disposed when retention has lapsed.
Rejection reason reference
| Reason | Typical trigger |
|---|---|
| Insufficient Quantity | Too little specimen to run the test. |
| Hemolysed | Red-cell rupture invalidates chemistry results. |
| Wrong Container | Drawn into the wrong tube / additive. |
| Wrong / Missing Label | Identity cannot be confirmed. |
| Clotted | Clot in an anticoagulated specimen. |
| Expired Tube | Collection tube past its expiry. |
| Contaminated | Specimen integrity compromised. |
| Temperature Abuse | Cold-chain or storage breach. |
| Other | Any reason not listed; record a note. |
Chain of custody
Every handling event on a specimen is logged as a chain-of-custody entry — collection, receipt, rejection, storage and disposal each append a record with the handled-by user, timestamp, action, location and an optional note. This produces a continuous, time-stamped history from draw to disposal, which is essential for medico-legal specimens and for accreditation audits.
Specimen status reference
| Status | Meaning |
|---|---|
| Collected | Drawn and labelled, not yet in the lab. |
| Received in Lab | Accessioned and ready for processing. |
| Rejected | Unsuitable; re-collection requested. |
| Stored | Held in a recorded storage location. |
| Disposed | Discarded after retention. |
Priority and turnaround
The request Priority — Routine, Urgent or STAT — sets the expectation for the lab and feeds turnaround monitoring. The actual TAT is measured from the request time to result release, so receiving and processing STAT specimens promptly keeps the measured turnaround honest. A request whose actual turnaround exceeds the target carried by its tests is flagged as a TAT breach, which surfaces in the Quality area's TAT report for follow-up.
Tips & troubleshooting
Specimen field reference
The fields recorded on every Lab Sample — these travel with the barcode and form the chain of custody:
| Field | Meaning | Required |
|---|---|---|
| Barcode | Unique specimen identifier printed on the label. | Auto |
| Sample Type | Whole blood, serum, plasma, urine, CSF, swab, sputum, tissue, semen, fluid or other. | Yes |
| Container | Tube / additive (EDTA, SST, heparin, citrate, fluoride, plain, sterile, swab tube, VTM). | Yes |
| Collected By | User who drew the specimen. | Yes |
| Collected At | Draw timestamp (defaults to now). | Yes |
| Received in Lab | Accession timestamp, set on Receive. | Auto |
| Rejection Reason / Notes | Reason and free-text when a specimen is rejected. | If rejecting |
| Disposed At | Disposal timestamp when retention lapses. | Auto on dispose |
Order priority reference
The request priority sets lab expectation and feeds turnaround monitoring:
| Priority | Use for |
|---|---|
| Routine | Standard scheduled testing; default priority. |
| Urgent | Clinically pressing but not life-threatening; expedite. |
| STAT | Immediate; receive and process the moment the specimen arrives. |
Chain-of-custody events
Each handling action appends a custody record. The lifecycle of a specimen produces these events in order:
| Action | Button | Resulting status |
|---|---|---|
| Collect | Collect Samples | Collected |
| Receive in lab | Receive | Received in Lab |
| Reject | Reject | Rejected (re-collection requested) |
| Store | Store | Stored |
| Dispose | Dispose | Disposed |