

Admissions & transfers
An admission is the record of one inpatient stay — the thread that ties a patient to a ward, a bed, a care team and a discharge plan from the moment they are booked in to the moment they leave. This page walks the full admit–transfer–discharge (ADT) workflow: how to admit a patient, move them between beds and wards, set up the care team and dietary order, and discharge them cleanly with the right outcome recorded. Admitting officers, ward clerks, charge nurses and attending doctors all touch this record.
Where to find it
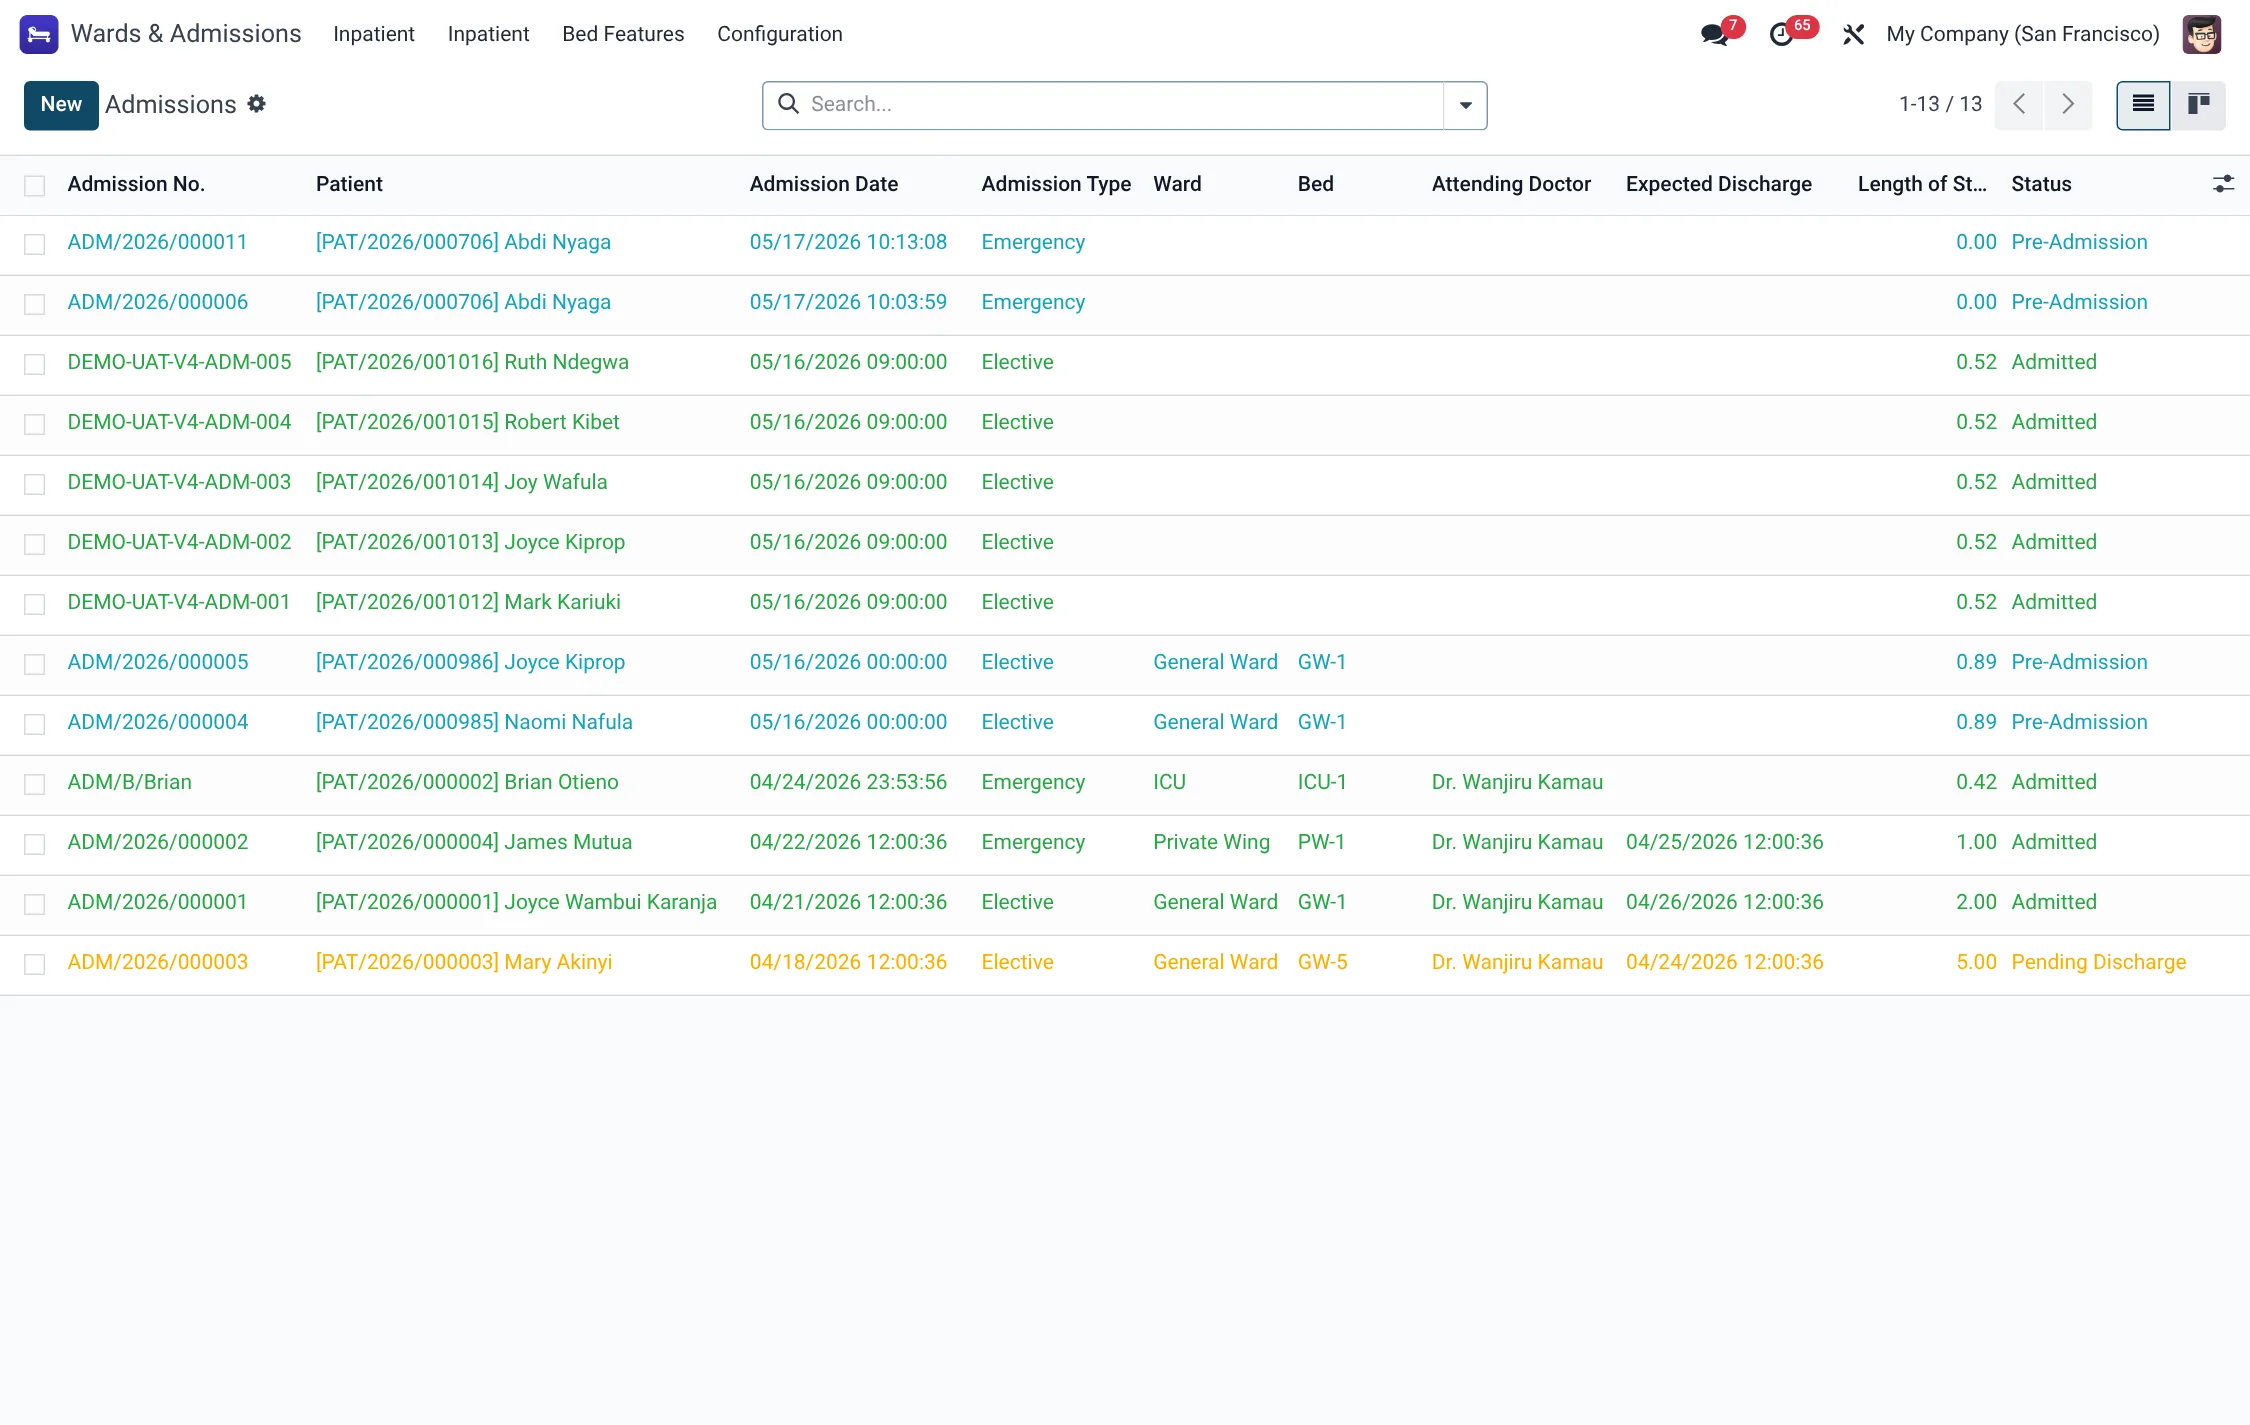
- Wards & Admissions → Inpatient → Admissions → Pre-Admission — booked stays not yet in a bed.
- Wards & Admissions → Inpatient → Admissions → Active — the patients currently admitted, on leave or pending discharge.
- Wards & Admissions → Inpatient → Admissions → Discharged and → All — closed and complete lists.
- Wards & Admissions → Inpatient → Transfers — the audit trail of every bed/ward move.
- Wards & Admissions → Inpatient → Occupancy, Length of Stay and 30-Day Readmissions — the management views.
Before you start
To admit a patient you need three things ready: the patient record, an available ward and bed (see Wards, rooms & beds), and usually a visit the admission is created from. If the stay is insurance-funded, have the policy and any pre-authorisation number to hand — there are fields for both on the admission.
Admit a patient
- Create a new admission (from a visit, from Emergency disposition, or directly under Admissions). Select the Patient; the stay opens in the Pre-Admission state.
- Choose the Ward and Bed. Set the Admission Type and Admission Route, and record the Chief Complaint.
- Name the Attending Doctor and, where known, the Primary Diagnosis and the Expected Discharge Date.
- Enter insurance details if applicable — policy, pre-authorisation number and validity.
- Press Admit Patient. The status moves to Admitted, the chosen bed flips to Occupied, and the stay is now live.
Admission states
Every stay walks a fixed status, and the closing states are deliberately kept distinct so mortality, self-discharge and transfer numbers stay clean:
| Status | Meaning |
|---|---|
| Pre-Admission | Booked and bed reserved, patient not yet physically in. |
| Admitted | Patient is in the bed; the stay is live. |
| On Leave | Authorised temporary absence; bed held. |
| Pending Discharge | Discharge requested; awaiting billing/pharmacy clearance. |
| Discharged | Stay closed by routine discharge. |
| Transferred | Closed by transfer to another facility. |
| Deceased | Closed by patient death. |
| Left Against Medical Advice | Patient self-discharged against advice. |
| Cancelled | Stay voided (created in error). |
Admission type & route
Two classifiers describe how the patient reached the ward. The Admission Type records the clinical category; the Admission Route records the pathway in:
| Admission Type | Admission Route |
|---|---|
| Elective | OPD (outpatient department) |
| Emergency | A&E / Emergency |
| Maternity | Direct Admission |
| Transfer In | External Referral |
| Readmission | Inter-Facility Transfer |
Leave and transfer
Two buttons handle movement during the stay:
- Mark On Leave records an authorised temporary absence and holds the bed; Return from Leave brings the patient back to Admitted.
- Transfer opens the transfer wizard to move the patient to another bed or ward. Pick the destination bed and a Reason, and confirm. The old bed is released, the new bed becomes occupied, and a transfer record is written to the Transfers log. The admission’s transfer count increments.
The transfer Reason is chosen from a fixed list so movement can be analysed later:
| Reason | When to use it |
|---|---|
| Clinical Upgrade | Patient needs a higher level of care (e.g. ward to HDU/ICU). |
| Clinical Downgrade | Patient is improving and steps down to a lower level. |
| Patient Request | Move at the patient’s request (e.g. to a private bed). |
| Bed Maintenance | Current bed is going out of service for repair. |
| Infection Control | Move required by isolation or cohorting rules. |
| Staffing Reallocation | Move to balance nursing workload across units. |
| Other | Any reason not covered above (free notes added). |
Discharge a patient
- When the patient is ready to leave, press Request Discharge. The status moves to Pending Discharge — the signal for billing and pharmacy to clear the account.
- Press Discharge to open the discharge wizard. Choose the Discharge Type (Routine, Against Medical Advice, Left Against Medical Advice, Transferred, Referred or Deceased) and the Discharge Destination.
- Record any Medications on Discharge and whether follow-up is required (linking a follow-up appointment).
- Confirm. The status becomes Discharged (or Deceased / LAMA / Transferred as chosen), the Discharge Date and Discharged By are stamped, the bed drops to Cleaning, and bed-nights and length-of-stay are finalised.
From the form you can also Print Admission Sheet at admit time and Print Discharge Summary once the stay has closed. The Cancel button voids a stay that should never have been created.
Discharge type & destination
The discharge wizard captures two fields: Discharge Type (the outcome) and Discharge Destination (where the patient went). Both come from fixed lists:
| Discharge Type | Discharge Destination |
|---|---|
| Routine | Home |
| Against Medical Advice | Nursing Facility |
| Left Against Medical Advice | Mortuary |
| Transferred | Other Hospital |
| Referred | Hospice |
| Deceased | Other |
| Absconded | — |
Care team & dietary
The admission names the Attending Doctor, and the nursing layer under HMS Core → Nursing adds nurse assignments, care plans and shift handovers around the bed. Dietary needs are handled by a Patient Diet Order under HMS Core → Wards & Admissions → Dietary → Operations → Patient Diet Orders: choose the therapeutic diet, set the Texture (Regular, Minced & Moist, Puree or Liquid), flag any fluid restriction or NPO (nil per os), and the order drives the kitchen tray tickets. The order runs Draft → Active → Completed, mirroring the admission.
Field reference
| Field | Meaning | Required |
|---|---|---|
| Patient | The admitted patient. | Yes |
| Ward / Bed | Where the patient is placed. | Yes to admit |
| Admission Type / Route | How and why the patient is being admitted. | Yes |
| Chief Complaint | Reason for admission, free text. | Recommended |
| Attending Doctor | Doctor responsible for the stay. | Recommended |
| Expected Discharge Date | Drives the “discharging next 72h” planning filter. | No |
| Insurance Policy / Pre-Auth | Funder and authorisation for the stay. | If insured |
| Status | Pre-Admission → Admitted → … → Discharged. | Auto |
| Discharge Type / Destination | Outcome and where the patient went. | At discharge |
Reports & KPIs
The admission records feed the Occupancy, Length of Stay and 30-Day Readmissions views, and each stay computes its own bed-night count and length-of-stay in days. The readmission flag is set automatically when a patient returns within the 30-day window, so quality teams can review it without manual matching.