

Routes, stops & vehicles
Routes are the backbone of transport: an ordered chain of stops that a vehicle drives morning and afternoon. Get the geography right and assignments, billing and GPS all just work.
Where to find it — App drawer → Transport → Routes & Stops → Routes.
Defining stops
A stop is a physical pick-up/drop-off point. Open Transport → Stops → New.
- Name the stop clearly (a landmark parents recognise, e.g. “Total Karen”).
- Drop the pin on the map to capture GPS coordinates – these drive arrival alerts later.
- Attach the stop to a fee band (see the setup page) so riders boarding there are priced correctly.
- Set a scheduled pick-up time and drop-off time.
Building routes
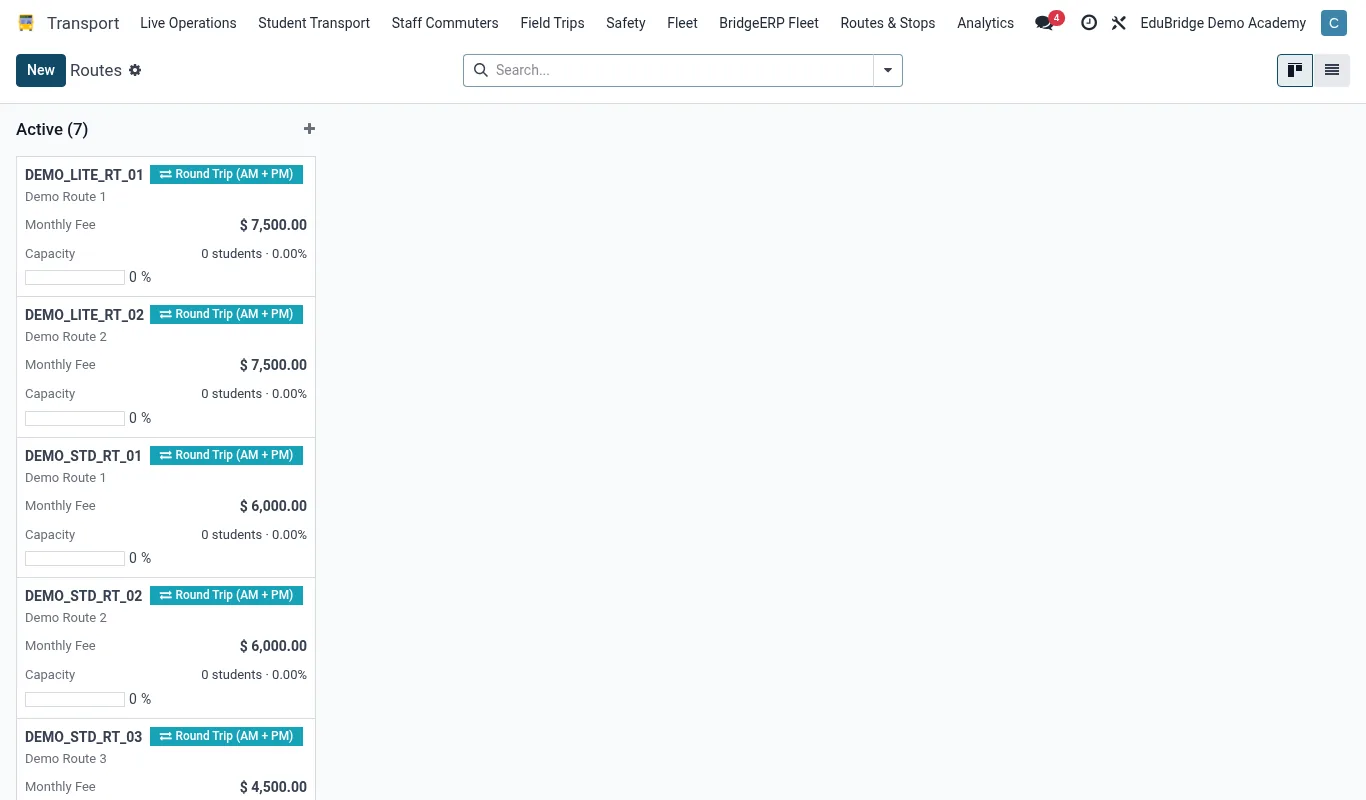
A route stitches stops into a driving order. Open Transport → Routes → New.
- Name the route and set its direction handling (most routes are bidirectional – reversed in the afternoon).
- Add stops in boarding order; drag to re-sequence.
- Assign the vehicle that runs this route and confirm the driver.
- Save – the route now appears on the live map and is selectable when assigning students.
| Field | Purpose |
|---|---|
| Stop sequence | Order buses arrive; drives ETA on the map |
| Vehicle | Links capacity and GPS device to the route |
| Driver | Owner of the driver app for this route |
| Operating days | Which weekdays the route runs |
Capacity & vehicle assignment
Capacity is tracked at the vehicle and surfaced on the route. As you assign riders, EduPrime shows seats used versus seats available so you never oversell a bus.
Tip – Keep one or two seats spare on each route for mid-term arrivals and the occasional guest rider – running every bus to 100% capacity leaves no slack when a family joins.
Important – If you swap a vehicle on a route (breakdown, service), update the route's vehicle field so the GPS device and capacity follow. Leaving a stale vehicle attached means the map tracks the wrong bus and capacity checks misfire.
Related pages
Was this page helpful?